
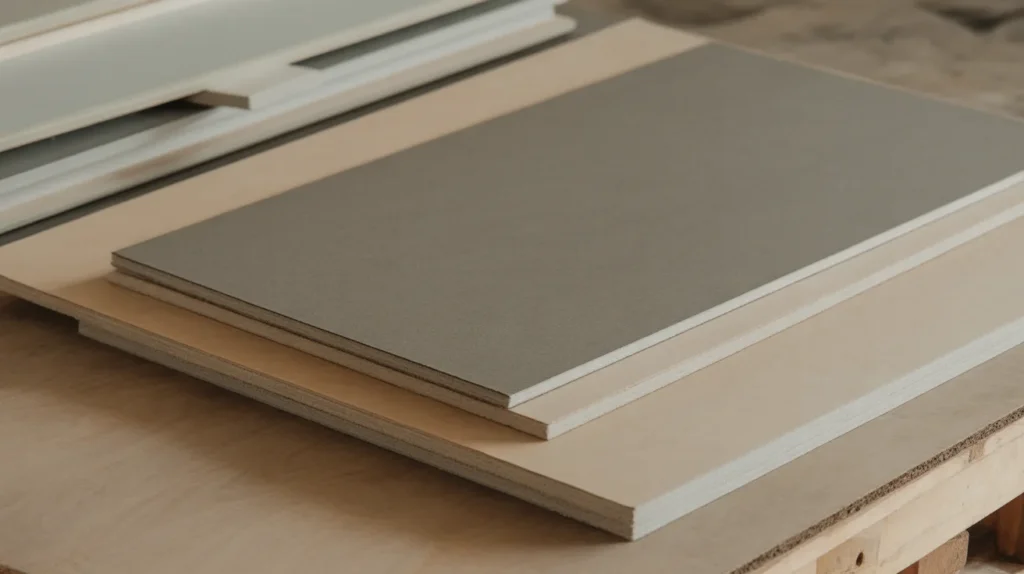
Architecture model materials divide into three groups: paper and board for fast massing, wood for sturdy presentation models, and plastics and metal for precision or transparency. What you can cut is often decided for you, since university fabrication labs publish approved lists and ban several common plastics outright.
Students usually choose architecture model materials by what the shop has in stock. Then they discover at the review that the model reads as a pile of chipboard rather than as an argument. Material is a representational decision, the same as line weight, and it carries meaning whether or not you intended it.
This guide covers what each material does well and the published cutting limits you have to design around. It also covers how material choice affects the photographs that end up in your portfolio.
What are the main architecture model materials?
Paper and board
Chipboard, museum board, mat board, bristol, corrugated card. Fast, cheap, forgiving, and the right choice for study models where the point is to test a massing rather than to present it.
Board reads as provisional, which is useful. A chipboard model says the design is still being worked out; the same form in maple says it is resolved. Sending the wrong signal at a review invites the wrong conversation.
Wood
Basswood, balsa, birch plywood, MDF, masonite. Basswood is the standard for presentation models because it cuts cleanly, holds an edge and photographs with an even grain that does not compete with the form.
Balsa is softer and cheaper, crushes easily and shows it. It belongs in quick study work rather than in anything that will be handled.
Plastics and metal
Acrylic for glazing and for anything that needs to read as transparent, brass and aluminium rod for slender structure, wire for guarded edges and railings. Precise and unforgiving. Mistakes are visible and hard to correct.
Everything else
Plaster, concrete, clay, resin, 3D printed polymer, found material. Worth using when the material is the argument, which is the only good reason to reach for it.
📐 Technical Note
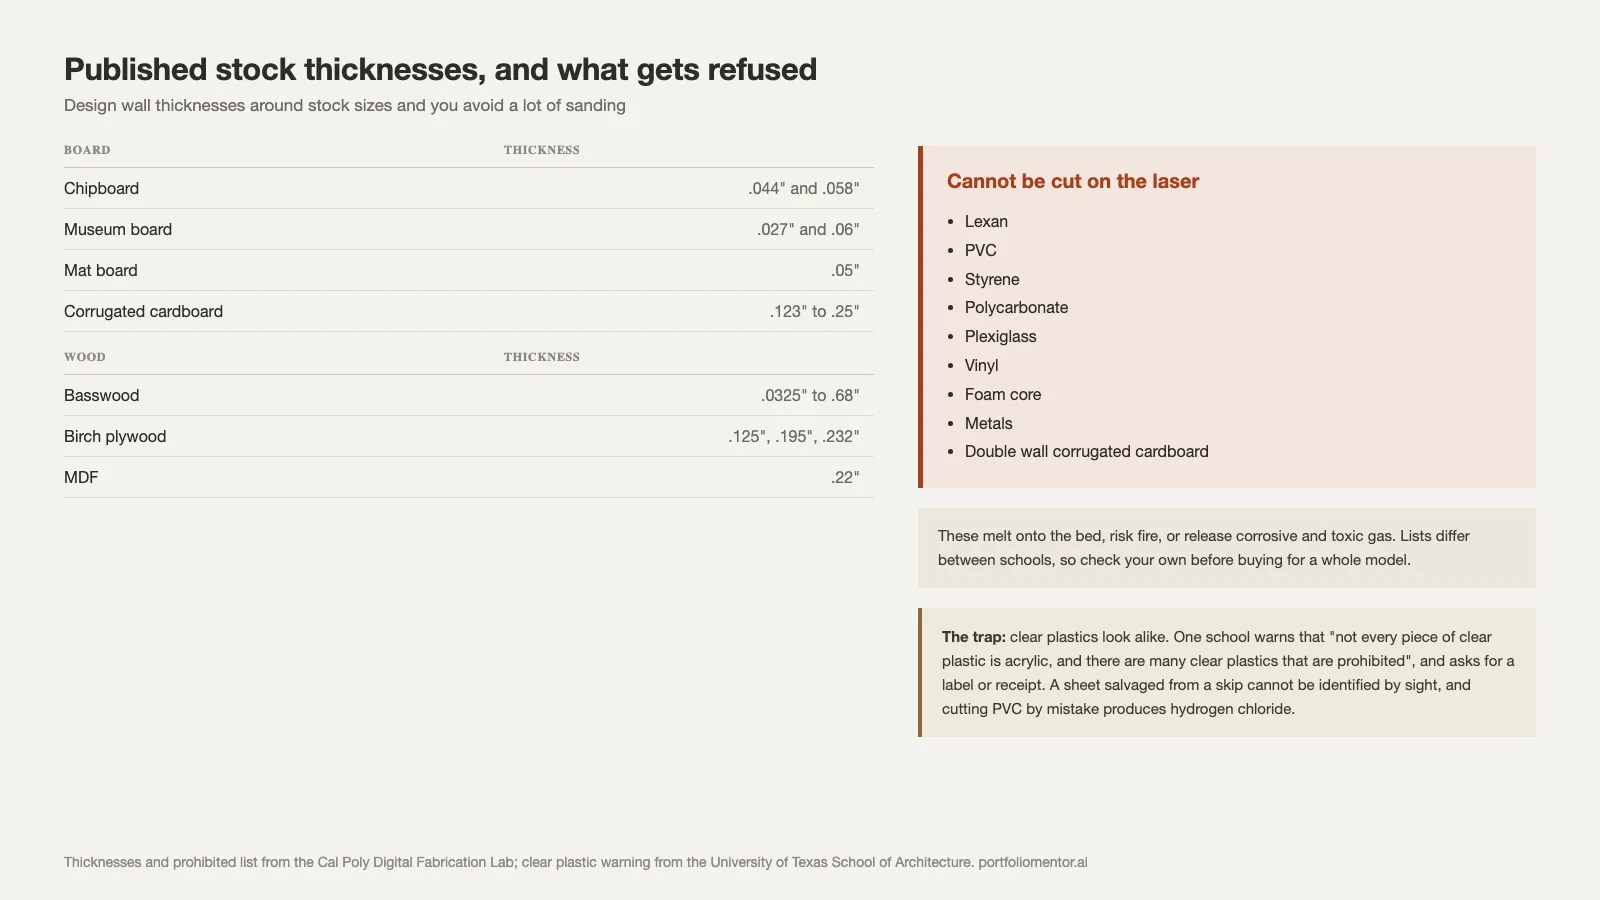
Published thicknesses from one university fabrication lab give a sense of what is standard. Board: chipboard .044″ and .058″, museum board .027″ and .06″, mat board .05″, corrugated cardboard .123″ to .25″. Wood: basswood .0325″ to .68″, birch plywood .125″, .195″ and .232″, MDF .22″ (Cal Poly Digital Fabrication Lab). Designing wall thicknesses around stock sizes avoids a lot of sanding.
What your fabrication lab will not let you cut
This is the constraint students discover too late, and it is published in advance at almost every school.
Cal Poly’s list states that “the following materials can not be cut on the laser cutter: Lexan, PVC, Styrene, Polycarbonate, Plexiglass, Vinyl, Foam Core, Metals, Double Wall Corrugated Cardboard.” Other schools permit acrylic but still ban PVC and polycarbonate. The reasoning across institutions is consistent: these materials melt onto the bed, risk fire, or release corrosive and toxic gas.
What makes this dangerous is that clear plastics look alike. The University of Texas School of Architecture warns that “not every piece of clear plastic is acrylic, and there are many clear plastics that are prohibited”. It asks for a label or receipt as verification. A sheet salvaged from a skip cannot be identified by sight, and cutting PVC by mistake produces hydrogen chloride.
⚠️ Common Mistake to Avoid
Buying material before checking the approved list and the maximum thickness for your shop. Lists and limits vary between institutions, and a sheet that cuts at one school is refused at another. Check the published list, keep the receipt or label, and confirm the thickness is within the machine’s range before you buy for a whole model.
Which material should you use for which model?
Four common purposes, each with a different answer.
Massing and site
Single material, no detail, context in a duller tone than the proposal. Chipboard or basswood. The moment you add windows to a massing model, you have lost the reason for making it.
Spatial and sectional
One material for structure, one contrasting for the cut plane. The cut should be immediately readable, which usually means a darker edge or a different colour on the sectioned face.
Detail and assembly
Material honesty matters here in a way it does not elsewhere. If the wall is brick, something should read as masonry rather than as a smooth plane, and layers should be separable so the assembly is legible.
Final presentation
Restraint. Two or three materials maximum, one of them dominant. Models that use six materials read as a sampler and photograph badly, which matters because the photograph is what enters your portfolio.
💡 Pro Tip
Build the context in a flatter, duller version of your primary material rather than a different one. Grey chipboard context under a basswood proposal reads instantly; context in white foam under a wood building reads as two unrelated models pushed together. The tonal gap does the work, not a material change.
Working by hand versus cutting digitally
The two produce different models and the difference shows, so the choice deserves more thought than availability of a machine slot.
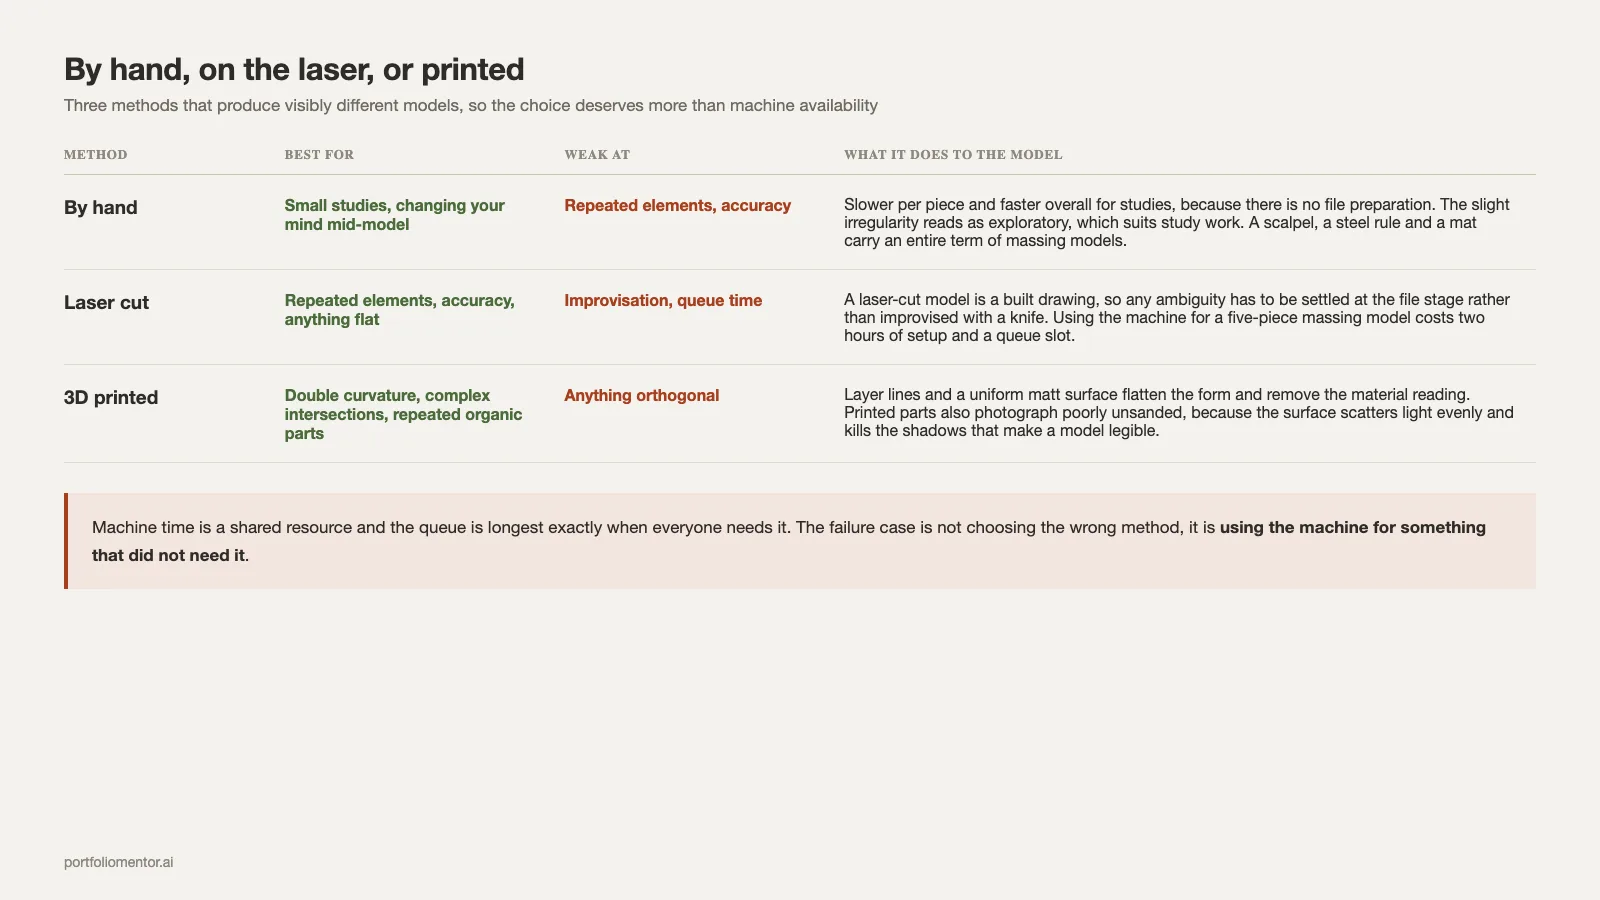
Hand cutting is slower per piece and faster overall for small studies, because there is no file preparation. It tolerates changing your mind mid-model, and the slight irregularity reads as exploratory, which is appropriate for study work. A scalpel, a steel rule and a cutting mat will carry an entire term of massing models.
Laser cutting is faster for repeated elements and far more accurate, and it forces you to resolve the model in drawing before you make it. That last part is the real difference. A laser-cut model is a built drawing, which means any ambiguity in the design has to be settled at the file stage rather than improvised with a knife. Preparing those files is the same skill set as preparing a portfolio document.
The failure case is using the machine for something that did not need it: a five-piece massing model that took two hours of file setup and a queue slot. Machine time is a shared resource and the queue is longest exactly when everyone needs it.
3D printing, and when it earns its place
Printing is the right tool for geometry that cannot be cut flat: double curvature, complex intersections, repeated organic components. It is the wrong tool for anything orthogonal, where the layer lines and the uniform matt surface flatten the form and remove the material reading entirely.
Printed models also photograph poorly without finishing. The surface scatters light evenly, which kills the shadows that make a model legible in a photograph, a problem covered in the model photography guide. If a printed component is going into the portfolio, budget time for sanding and priming.
Materials for reuse and retrofit projects
Projects about existing buildings pose a specific problem: the model has to distinguish what is there from what you are adding, and a single material cannot do it.
The convention that reads most clearly is a neutral, slightly duller material for the existing fabric and a warmer or lighter one for the intervention. Grey board existing with basswood insertion is the most common pairing and it works because the tonal difference survives photography in black and white.
What fails is using a dramatic material for the new work, such as brass or acrylic against board. The contrast becomes the subject and the model starts arguing that the intervention is precious, which is rarely the point you want to make. Restraint here is read as maturity. The same principle applies to how the project is drawn, discussed among the recurring issues in common architecture portfolio mistakes.
Scale decides material more than taste does
A material that works at one scale fails at another, and this is the most common structural error in student models.
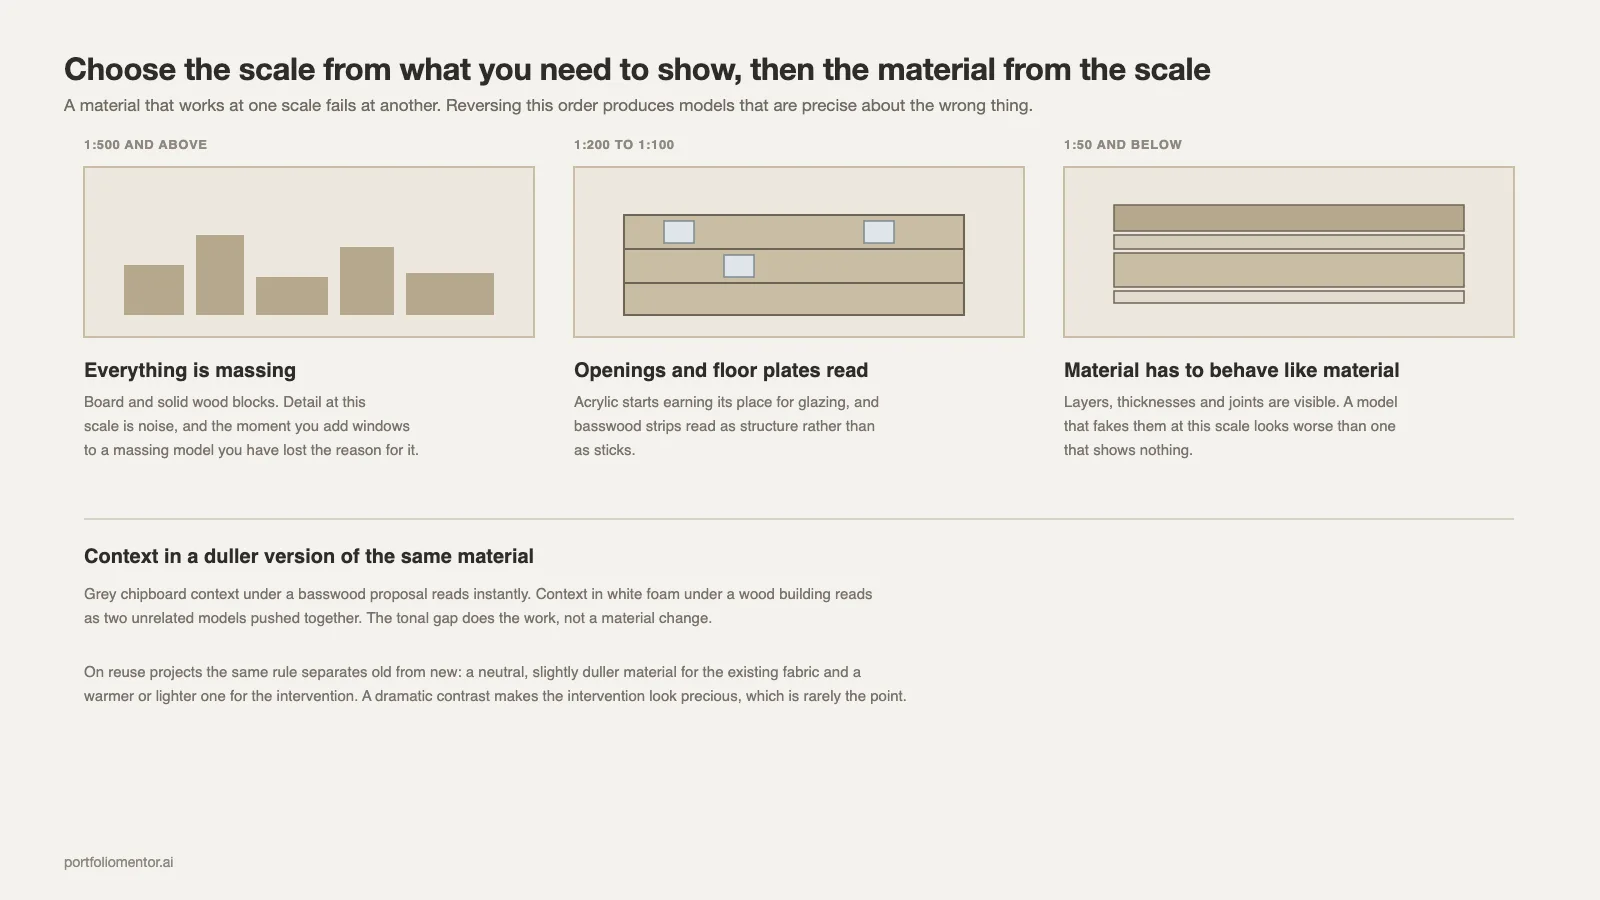
At 1:500 and above, everything is massing. Board and solid wood blocks. Detail at this scale is noise.
Around 1:200 to 1:100, openings and floor plates become legible. This is where acrylic starts earning its place for glazing and where basswood strips read as structure rather than as sticks.
At 1:50 and below, material has to behave like material. Layers, thicknesses and joints are visible, and a model that fakes them at this scale looks worse than one that shows nothing.
Choose the scale from what you need to show, then choose material from the scale. Reversing that order produces models that are precise about the wrong thing.
Glue, cutting and the parts that go wrong
- Adhesive by material. PVA for wood, spray mount or double-sided tape for board where a wet glue would warp it, acrylic cement for plastic. Using one adhesive for everything is the fastest route to a warped model.
- Cut direction on board. Board has a grain. Cutting against it tears the surface layer, which shows in photographs even when it is invisible in the hand.
- Burn marks. Laser cutting leaves a scorched edge on wood and board. On a presentation model this either has to be sanded, masked with tape before cutting, or accepted deliberately as part of the look.
- Squareness. Most models fail at the corners. Building a simple jig for repeated right angles costs ten minutes and saves the model.
Many schools also publish machine power and speed settings by material, which removes the guesswork from test cuts. The University at Buffalo School of Architecture and Planning publishes power and speed values by material for its machines. Check whether your own lab does the same before burning through stock to find a setting.
What the model becomes in a portfolio
The model is not what a reviewer sees. The photograph of the model is, and material choice determines whether that photograph works.
Glossy acrylic reflects the room, including you and the ceiling lights. Dark materials lose all detail in shadow. White-on-white loses the form entirely without careful lighting. Basswood and grey board photograph forgivingly, which is a real argument for using them on anything destined for a portfolio.
Physical making sits within Process and Production Quality in a portfolio review. It is one of the few categories where students with modest drawing skill can be genuinely strong. The photography that carries it is covered in the architecture model photography guide.
How many model photographs belong in a project, and where they sit relative to the drawings, is a sequencing question. It is handled in portfolio layout and design and in the wider architecture portfolio guide.
Budgeting material for a term
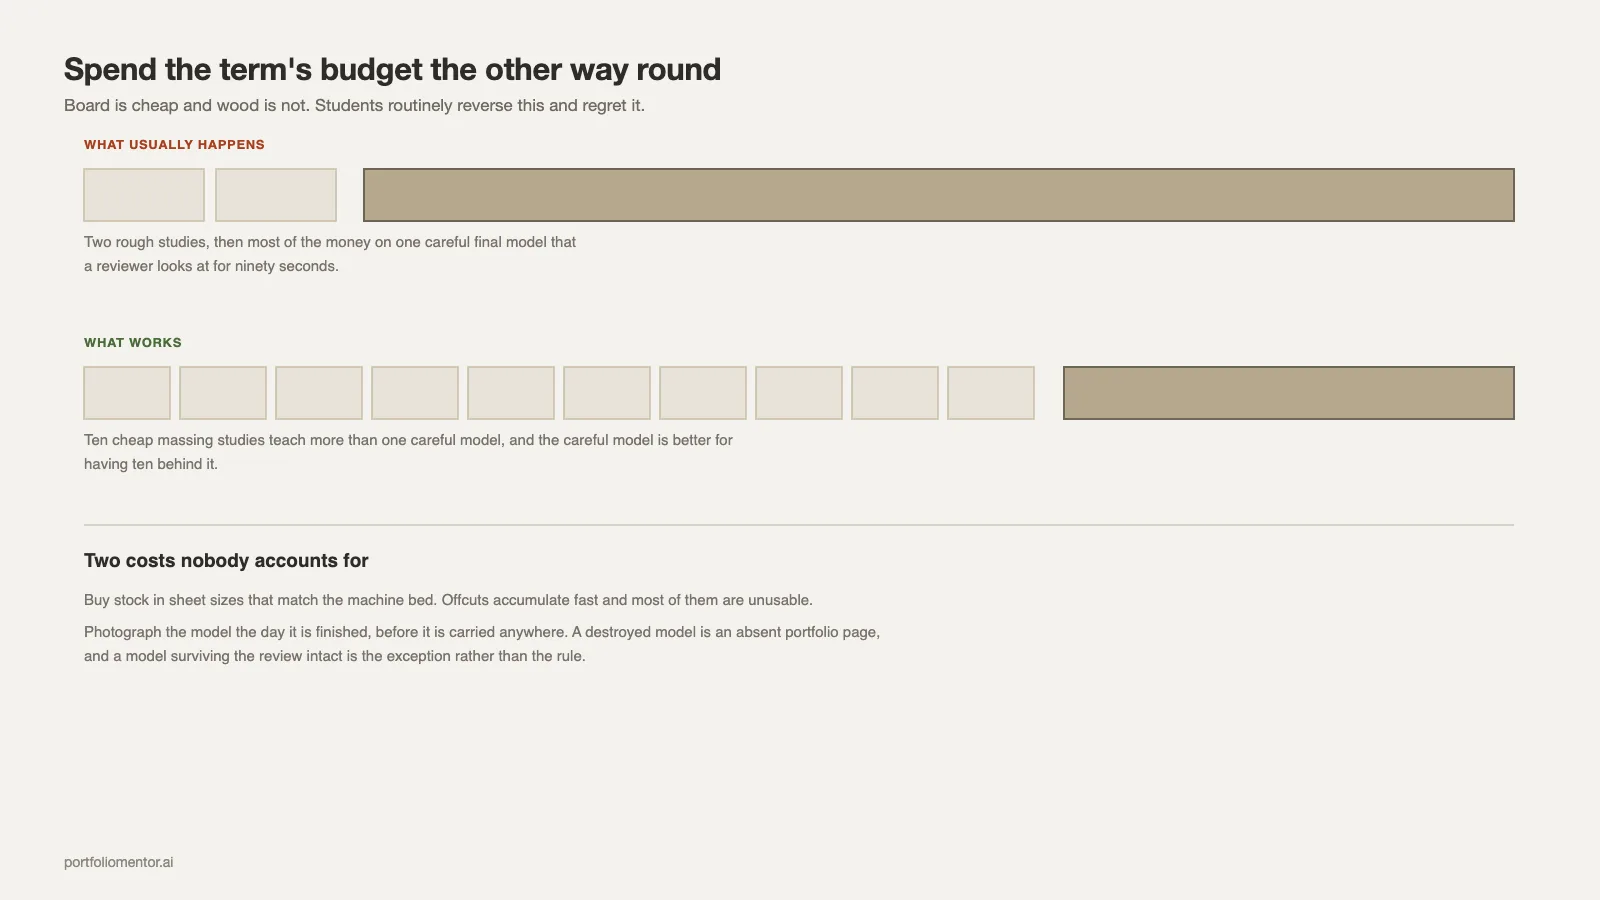
Architecture model materials are cheap in board and expensive in wood. Students routinely spend most of the budget on a final model that a reviewer looks at for ninety seconds.
A workable split: keep study models in the cheapest material available and make many of them, then spend on one presentation model. Ten rough massing studies teach more than one careful model, and the careful model is better for having ten behind it.
Buy stock in sheet sizes that match the machine bed. Offcuts accumulate fast and most of them are unusable, which is a hidden cost nobody accounts for at the start of term.
Storing and transporting what you made
Models get destroyed between the review and the photograph more often than students expect, and a destroyed model is an absent portfolio page.
Photograph the model the day it is finished, before it is carried anywhere. This single habit saves more portfolio material than any other, because a model that survives the review intact is the exception rather than the rule.
For transport, build a base larger than the model with a lip, and carry it in a box rather than by hand. Board models absorb humidity and warp within weeks, so anything you want to keep should be stored flat and dry rather than on a windowsill.
Where a model is genuinely fragile, consider whether it needs to survive at all. A study model has done its job once it is photographed and discussed, and disposing of it deliberately is better than storing it badly. Keeping the photograph, the drawing file and a short note on what the model tested is what turns a term of making into usable undergraduate portfolio material.
The short version
Board for studies, basswood for presentation, acrylic where transparency is the point, and nothing your shop bans. Check the approved list and thickness limits before buying. Pick the scale from what you need to show, the material from the scale, and keep the palette to two or three. Then remember that the photograph, not the model, is what enters the portfolio.

